Blogger trick 4 you about the blogger, seo services, adsense, softwares, tips and trick, games, widgets, hosting, make money, how to create a website.

Showing posts with label widgets. Show all posts

Tuesday, 24 December 2013

Social Bookmarking Widget For Blogger – Bookmark and Share homepages

By on 17:34
Bookmarking-Widget For BloggerWith the release of Add Cute Flying Twitter Bird I also released some useful blogger widgets which includes a Bookmarking Widget For your blog’s homepage. This widget helps readers to bookmark your blog’s homepage on their favourite bookmarking services like Google bookmark, Stumbleupon, Delicious, Digg etc. It contains icons from  our Social Share Widget With Counters. This is how this widget looks like,

Bookmarking Widget
To add this widget to your blogs, follow these steps,
  1. Go To Blogger > Layout
  2. Click Add a Gadget or Add a Page element
  3. Choose HTML/JavaScript
  4. Inside HTML/JavaScript paste the code below,
<center><tr>
<td valign="top" width="50%">
<table border="0" cellpadding="0" cellspacing="0" width="222">
<tbody>
<tr>
<td width="28" height="30"><img border="0" width="25" src="https://blogger.googleusercontent.com/img/b/R29vZ2xl/AVvXsEg52P_pP9vqUsVvtu65ejKBPdaOcboLth_SzX9TIonGf7Z93zgBevauKJk8FrLjWDYFuA2H47SBqthSGnNM4XZsyxyqUAdNCmnNDYcjeQCbEZJDiOiknXeaoDfqZqrFZ6mTfKJRS-eLJu0/s400/FACEBOOK.png" height="25"/></td>
<td height="30"><a href="http://www.facebook.com/sharer.php?u=http://YOUR-BLOG-NAME.blogspot.com" target="_blank" rel="nofollow">Share on Facebook</a></td>
</tr>
<tr>
<td height="30"><img border="0" width="25" src="https://blogger.googleusercontent.com/img/b/R29vZ2xl/AVvXsEi6moZ70FsEeNyWhqTzAbo9aR7ydwsewrHEvCY9gMsTOvT8PTsrYAMpIpJsSJMxNzADtpz8t36DvKfEec0Za6xMtw92nUEZstkhJfhH0rvciDE12itCzMb30yA88bAJEV0wPA4RyiaeY48/s400/TWITTER.png" height="25"/></td>
<td height="24">
<a href="http://twitthis.com/twit?url=http://YOUR-BLOG-NAME.blogspot.com">Share on Twitter</a></td>
</tr>
<tr>
<td height="30"><img border="0" width="25" src="https://blogger.googleusercontent.com/img/b/R29vZ2xl/AVvXsEiME9d6Xb-dAJSb1nwLyOK8xxCi63wGcbo1TAlSfBHm447sScIpOGDZPqkw3vZZ4KFSDDy57LSJlWAvkstne4prJuT1bxG-E87crmTtF2aWaLTogZvQfz87leDPQzsX_LWxEZF9Z6-7pOc/s400/STUMBLE-UPON.png" height="25"/></td>
<td height="30"><a href="http://www.stumbleupon.com/submit?url=http://YOUR-BLOG-NAME.blogspot.com" target="_blank" rel="nofollow">Share on StumbleUpon</a></td>
</tr>
<tr>
<td height="30"><img border="0" width="25" src="https://blogger.googleusercontent.com/img/b/R29vZ2xl/AVvXsEjAfWnMN3A9F2W5QfqIVHSw3CwL3XRNKYQ6PrOh7CnJfDG5pqpaii_CLS9FJ8vI0hNaAOS_T2UO3h7QMumHOAlFobMt6LPw44Gm6BGgmz9KajosXioS2U2Lkype7knI2zKSInzTOBtuVIY/s400/DELICIOUS.png" height="25"/></td>
<td height="30"><a href="http://del.icio.us/post?url=http://YOUR-BLOG-NAME.blogspot.com" target="_blank" rel="nofollow">Share on Delicious </a></td>
</tr>
</tbody>
</table>
</td>
<td valign="top" width="50%">
<table border="0" cellpadding="0" cellspacing="0" width="222">
<tbody>
<tr>
<td width="28" height="30"><img border="0" width="25" src="https://blogger.googleusercontent.com/img/b/R29vZ2xl/AVvXsEj4tkOTvRY1CyMWVrdG4BIRlq2Klb_UarGzDVB4rF80Etnqn6se9SNrFx0YEjy1a5MJGkvQDNyUTNFUB_vV7FvA_UfkdeGCiDhBswU6enQ7_yLXXXusKsSTCCoTqpaoMrIoASIrHRxL4to/s400/DIGG.png" height="25"/></td>
<td height="30"><a href="http://digg.com/submit?phase=2&url=http://YOUR-BLOG-NAME.blogspot.com" target="_blank" rel="nofollow">Share on Digg </a></td>
</tr>
<tr>
<td height="30"><img border="0" width="22" src="https://blogger.googleusercontent.com/img/b/R29vZ2xl/AVvXsEjcUzuI7MgCHcJVBmBgGKbQJa-r9pTlHMocugOJRoIhbbTU_dfWMX9MAd_DoOI_IfSngKzjr-qc9F6EmUdvn4sGY65U7vn16q6LbVfOk_-RctnK2ESeSEAyt2oQI36_NinSCv26QjACKSg/s400/Google-icon.jpg" height="22"/></td>
<td height="30"><a href="http://www.google.com/bookmarks/mark?op=edit&amp;output=popup&amp;bkmk=http://YOUR-BLOG-NAME.blogspot.com" target="_blank" rel="nofollow" title="Bookmark this blog on Google">Bookmark on Google</a></td>
</tr>
<tr>
<td height="30"><img border="0" alt="Email" width="21" src="https://blogger.googleusercontent.com/img/b/R29vZ2xl/AVvXsEgIpuinWlVimbW9SPmblJFXOR6DObOR0U-WpsSpB_gFq0WU9IrBGrhYcyrE1TXmcMUdXNDUjJQIlC7AKGbOhMDn-xokCqOb_dzCU9pj3H3QeJwaJschjYdJhDVSMtMzkHGLNKVuZSSAUx4U/s400/Email+Orange_128.png" height="22"/></td>
<td height="30"><a href="http://feedburner.google.com/fb/a/mailverifyuri=tntbystc&amp;loc=en_US" target="_blank" rel="nofollow">Receive Email Updates</a>
</td>
</tr>
</tbody>
</table></td></tr></center>
Remember to replace YOUR-BLOG-NAME  with your Blog’s good name and the Subscription Link i.e http://feedburner.google.com/fb/a/mailverifyuri=tntbystc&amp;loc=en_US with your own Feedburner subscription link. You can find your subscription link by going to the following location in your feedburner account, Publicize > Email Subscription . Just below Email Subscription page you will find a code as shown below,
subscription-link


Finally save your widget and preview your blog to see the new change on your blog!

Add CSS Based Social Bookmarking Widget To Blogger Blogs & Websites

By on 17:25
Social-Bookmarking-Widget-For BloggerNever thought this would turn the best designing period of my life. After a lot of trial and error I managed to create a social bookmarking Icons widget using advanced CSS technique. I had consulted a lot of my friends on how to give an hover effect to social bookmarking icons below blogger posts using simple CSS but all methods that were suggested unfortunately did not help.
This widget uses a total of 20 Icons but believe it or not it is super-fast and loads with in seconds. I merged all 20 Icons into one big image and used CSS Image stripes techniqueto make the icons appear at right positions. Fortunately this saves a lot of load time, because the browser will load all images at once and doesn’t need to contact the image server several times for uploading the images.
This is the big image I used,mbt-bookmarking-widget
Now lets add them below each post in blogger ,
  1. Go To Blogger > Layout > Edit HTML
  2. Search For ]]></b:skin>
  3. And paste the code below just above ]]></b:skin>
/*--------BT4U Bookmarking Widget (CSS#1)------*/
.mbt-bookmarking a {
display:block;
height:42px;
width:48px;
padding:0 9px;
float:left;
background:transparent url(https://blogger.googleusercontent.com/img/b/R29vZ2xl/AVvXsEiCMcwFmb_V0uGDf-cnyNep8yIcesHSEtn3ifLR2GGxm2FM4qEkaqLxRUIZECAkTITeqGGh8-ox80bJU5mqkBqWB1IOsMrcZEHJ5RzcVMuNYQ7OUm-V_ZNVfddLiAZoQ4sKcxgYtKuBF7tz/s1600/flapper.jpg) no-repeat;
}
.mbt-bookmarking a.delicious {
background-position:0px 0px;
}
.mbt-bookmarking a.delicious:hover {
background-position:0px -43px;
}
.mbt-bookmarking a.digg {
background-position:0px -86px;
}
.mbt-bookmarking a.digg:hover {
background-position:0px -129px;
}
.mbt-bookmarking a.stumbleupon {
background-position:0px -344px;
}
.mbt-bookmarking a.stumbleupon:hover {
background-position:0px -387px;
}
.mbt-bookmarking a.technorati {
background-position:0px -430px;
}
.mbt-bookmarking a.technorati:hover {
background-position:0px -473px;
}
.mbt-bookmarking a.twitter {
background-position:0px -516px;
}
.mbt-bookmarking a.twitter:hover {
background-position:0px -559px;
}
.mbt-bookmarking a.facebook {
background-position:0px -172px;
}
.mbt-bookmarking a.facebook:hover {
background-position:0px -215px;
}
.mbt-bookmarking a.reddit {
background-position:0px -258px;
}
.mbt-bookmarking a.reddit:hover {
background-position:0px -301px;
}
.mbt-bookmarking a.yahoo {
background-position:0px -602px;
}
.mbt-bookmarking a.yahoo:hover {
background-position:0px -645px;
}
.mbt-bookmarking a.rss {
background-position:0px -774px;
}
.mbt-bookmarking a.rss:hover {
background-position:0px -817px;
}
     4.     Now Check the box “Expand Widget Templates” at the top-right-cornerexpand-widgets
     5.      Search for this code <data:post.body/> . If you can not find it then search for this one<p><data:post.body/></p>                                     (Tip:- Press Ctrl + F)
     6.      Just below <data:post.body/> OR <p><data:post.body/></p>, paste this code,
<!--BT4U Bookmarking Widget (HTML)--> <div class='mbt-bookmarking'>
<b:if cond='data:blog.pageType == &quot;item&quot;'>
<br/><font color='#289728' face='ms sans serif' size='3'><b>Kindly Bookmark and Share it:</b></font>
<br/><br/>
<!-- Delicious -->
<a class='delicious' expr:href='&quot;http://del.icio.us/post?url=&quot; + data:post.url + &quot;&amp;title=&quot; + data:post.title' rel='external nofollow' target='_blank' title='Add this to Delicious :&gt;'/>
<!--DIGG-->
<a class='digg' expr:href='&quot;http://digg.com/submit?phase=2&amp;url=&quot;  + data:post.url' rel='external nofollow' target='_blank' title='Digg this :&gt;'/>
<!--Stumble-->
<a class='stumbleupon' expr:href='&quot;http://www.stumbleupon.com/submit?url=&quot; + data:post.url + &quot;&amp;title=&quot; + data:post.title' rel='external nofollow' target='_blank' title='Stumble this :&gt;'/>
<!-- Technorati -->
<a class='technorati' expr:href='&quot;http://technorati.com/faves?add=&quot; + data:post.url' rel='external nofollow' target='_blank' title='Fave this :&gt;'/>
<!-- Twitter -->
<a class='twitter' expr:href='&quot;http://twitthis.com/twit?url=&quot; + data:post.url + &quot;&amp;title=&quot; + data:post.title' rel='external nofollow' target='_blank' title='Tweet this :&gt;'/>
<!--Facebook-->
<a class='facebook' expr:href='&quot;http://www.facebook.com/sharer.php?u=&quot; + data:post.url + &quot;&amp;t=&quot; + data:post.title' rel='external nofollow' target='_blank' title='Share this on Facebook :&gt;'/>
<!-- Reddit -->
<a class='reddit' expr:href='&quot;http://reddit.com/submit?url=&quot; + data:post.url + &quot;&amp;title=&quot; + data:post.title' rel='external nofollow' target='_blank' title='Bookmark and tag this :&gt;'/>
<!-- Yahoo -->
<a class='yahoo' expr:href='&quot;http://myweb2.search.yahoo.com/myresults/bookmarklet?t=&quot; + data:post.url + &quot;&amp;title=&quot; + data:post.title' rel='external nofollow' target='_blank' title='Bookmark this :&gt;'/>
<a class='rss' expr:href='data:blog.homepageUrl + &quot;feeds/posts/default&quot;'/>
</b:if></div>

You can replace the bolded text in green with any statement you like. You can also change the text colour i.e #289728 with any colour you like. Use our Color Chart for this purpose.
   7.     Now Finally save your template and view your blog to see a colorful bookmarking widget just below all your posts :>
That’s All!
If you want larger icons approximately about 64px by 64px in size, then paste the following code just above ]]></b:skin> 
/*--------BT4U Bookmarking Widget (CSS#2)------*/
.mbt-bookmarking a {
display:block;
height:55px;
width:64px;
padding:0 5px;
float:left;
position:relative;
background:url(https://blogger.googleusercontent.com/img/b/R29vZ2xl/AVvXsEj81GJlUQHtKG9alcSGudVSnxWEItBK6yY6O9GrmjEz7T_3uNDxOG27K_qehAxVj2ZLUEnONVl2yBnS6xQ55hsAhuD6D0GhGRykNJcxbRuznsf-Y6w6qzLcSoJDKQv3Ld-ToA7XR1wiyTfk/s1600-h/flapper2.jpg) no-repeat;
}
.mbt-bookmarking a.delicious {
background-position:0px 0px;
}
.mbt-bookmarking a.delicious:hover {
background-position:0px -57px;
}
.mbt-bookmarking a.digg {
background-position:0px -114px;
}
.mbt-bookmarking a.digg:hover {
background-position:0px -171px;
}
.mbt-bookmarking a.stumbleupon {
background-position:0px -228px;
}
.mbt-bookmarking a.stumbleupon:hover {
background-position:0px -285px;
}
.mbt-bookmarking a.technorati {
background-position:0px -570px;
}
.mbt-bookmarking a.technorati:hover {
background-position:0px -627px;
}
.mbt-bookmarking a.twitter {
background-position:0px -684px;
}
.mbt-bookmarking a.twitter:hover {
background-position:0px -741px;
}
.mbt-bookmarking a.facebook {
background-position:0px -456px;
}
.mbt-bookmarking a.facebook:hover {
background-position:0px -513px;
}
.post-bookmark a.reddit {
background-position:0px -342px;
}
.mbt-bookmarking a.reddit:hover {
background-position:0px -399px;
}
.mbt-bookmarking a.yahoo {
background-position:0px -798px;
}
.mbt-bookmarking a.yahoo:hover {
background-position:0px -855px;
}
.mbt-bookmarking a.rss {
background-position:0px -912px;
}
.mbt-bookmarking a.rss:hover {
background-position:0px -969px;
}

Monday, 23 December 2013

Show Off Follower Counts For RSS, Twitter and Facebook Followers

By on 15:30
Follower Counter for facebook, twitter and  feedburnerYou have seen many mind blowing widgets on wordpress blogs but its now time to make Blogger a better place! Presenting to you just another beautiful and yet useful widget that displays the current number of your blog subscribers, twitter and facebook followers. This widget is based solely on pure CSS and HTML with no JavaScript involved therefore you just need to update the counts manually. At present I am learning programming too so as soon as I develop some good command in programming, I will automate all BT4U widgets but at present bear with me as a designer only


Read Also:How The Facebook Help You To Get Traffic

Follow the Steps Below To Add The Follower Counter To Your Blogger Blogs

  1. Go To Blogger > Layout
  2. Choose Add a Gadget or Add a Page element
  3. Select HTML/JavaScript widget
  4. Paste the code below inside it,
<style>
.rss-mbt {
    background: url(https://blogger.googleusercontent.com/img/b/R29vZ2xl/AVvXsEj5CcGbJ34ggtGQjZrKXUou5jE5wUeTVMstOu-8OCD0xPvhN0AbHvyp25JKGeo_f_8JeuSu7-6r9xJ0z9HfAF4SZWZ_8pFFwXAZ5sReYnDlJhpMCfBdoMCU3ofZ0Rq0wfn2Bd4c_4x9UVw/s800/RSS1.png) no-repeat;
    height: 64px;
    padding: 0px 20px 0px 80px;
    margin-top: 20px;
}
.twitter-mbt {
    background: url(https://blogger.googleusercontent.com/img/b/R29vZ2xl/AVvXsEh6wypqYs6t0uZqUIcGVWcFAuhG5NQ8AcSlxQH_shSuXHDmfnov4k-4uGFDwGeGh0DLG5h28MSqQRoZdt7HnKEcAKG0WCZJ0oC20mHPCua5zEl0fhXTVCd1hNPJXKlm3ZvhumXcWyqzNN4/s800/TWITTER1.png) no-repeat;
    height: 64px;
    padding: 0px 20px 0px 80px;
    margin-top: 20px;
}
.facebook-mbt {
    background: url(https://blogger.googleusercontent.com/img/b/R29vZ2xl/AVvXsEilWm_HgQXmH-lRL0JjqU91YKMnxCVKws0idvCu92cOP9-WcJw5tTrOeKw6XEtgQrKHb44ok9nfxMLoZ_3EFgHnHC7GLUaS20cP3nQVDP_KjFwYTjZzmT4hdRjT0YLfAJT4bqWhVAX6FAs/s800/FACEBOOK1.png) no-repeat;
    height: 64px;
    padding: 0px 20px 0px 80px;
    margin-top: 20px;
}
.follower-rss, .follower-twitter, .follower-facebook {
    font-family: Georgia,  sans-serif, Times;
    font-size: 1.1em;
        font-style:italic;
        color:#289728;
}
.follower-rss span {
    font-size: 1.9em;
    font-weight: bold;
        font-style:italic;
        color:#FFB93C;  
}
.follower-twitter span {
    font-size: 1.9em;
    font-weight: bold;
        font-style:italic;
        color:#6DB6E6;  
}
.follower-facebook span {
    font-size: 1.9em;
    font-weight: bold;
        font-style:italic;
        color:#3889BA;  
}
</style>
<div class="rss-mbt">
<div class="follower-rss"> <span>515</span> loyal readers
</div>
<a href="ADD-RSS-FEED-URL-HERE" rel="nofollow">RSS feed</a>
| <a href="ADD-RSS-EMAIL-FEED-URL-HERE" target="_blank" rel="nofollow">E-mail</a>
</div>
<div class="twitter-mbt"><div class="follower-twitter"><span>1058</span> followers</div>                         
<a href="ADD-YOUR-TWITTER-URL-HERE" target="_blank" rel="nofollow" title="I definitely follow you back">Follow us on Twitter!</a>
</div>                       
<div class="facebook-mbt">                     
<div class="follower-facebook"><span>260</span> followers                            </div>                         
<a href="ADD-YOUR-FACEBOOK-URL-HERE" target="_blank" rel="nofollow">Join us on Facebook!</a>
</div>

NOTE:- Make sure to replace the bolded text with the required details (links of your Feedburner, twitter and facebook accounts) and replace the bolded numbers with your current follower counts. For example replace 515  with your current number of Subscribers, replace  1058 with the number of your twitter followers and replace 260 with the number of your facebook followers

     5.    Save and you are done! Now view your blog to see a stunning widget hanging on your sidebar 

Social Share Widget With Counters For Blogger

By on 15:21

social-share-widget
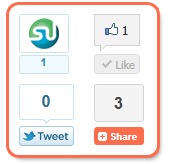
The Social networking sites growing traffic is indirectly to webmasters themselves. the more they receive traffic the more visitors we receive when people share you content with friends and colleagues. The widget today consists of Facebook, Twitter, StumbleUpon box counters along with Addthis Counter which makes it a complete package of social media sharing buttons. To Add this widget to your blogspot blogs kindly follow the steps mentioned below.

Add Social Share Widget To Blogger

  1. Go To Blogger > Design > Edit HTML
  2. Backup your template
  3. Check the "Expand Widgets Templates" Box
  4. Search for <data:post.body>
  5. Just above it paste the code below,
    Read Also:Twitter Recent Posts Widget, The Rare Widget Ever

<b:if cond='data:blog.pageType == &quot;item&quot;'>
<div align='right'><table border='0' cellpadding='2' cellspacing='0' width='150'><tbody>
    <tr>
      <td valign='top'>    <script src='http://www.stumbleupon.com/hostedbadge.php?s=5'/>
</td>
      <td valign='top'>   <div id='fb-root'/><script src='http://connect.facebook.net/en_US/all.js#xfbml=1'/><fb:like font='' href='' layout='box_count' send='false' show_faces='false'/></td>
    </tr>
    <tr>
      <td valign='top'><a href="http://twitter.com/share" class="twitter-share-button" data-count="vertical">Tweet</a><script type="text/javascript" src="http://platform.twitter.com/widgets.js"></script> </td>
      <td valign='top'>
<!-- AddThis Button BEGIN -->
<div class='addthis_toolbox addthis_default_style '>
<a class='addthis_counter'/>
</div>
<script src='http://s7.addthis.com/js/250/addthis_widget.js#pubid=xa-4de39fde7c998f6e' type='text/javascript'/>
<!-- AddThis Button END -->
</td>
    </tr>
  </tbody></table></div></b:if>

If you wish to align the widget to left then replace  right with left
6.Save and you are done!
Read More:Create a Floating Feedback and Back-To-Top Button For Your Blogs
Let me know if you needed any help.

Sunday, 22 December 2013

Add a Cute Flying Twitter Bird To Your Blogs

By on 13:33
flying-twitter-birdWith Twitter's worldwide popularity and with over 200 million users, generating 65 million tweets a day, it has become a must for every web master to use twitter sharing buttons and applications as much on his web as possible. This lets users to easily  tweet our blogs and websites which thereby generates traffic for us in return. Muhammad Awais Afzal of BT4U has coded a beautiful cute twitter bird that flies from corner to corner of your web page as you scroll up or down. It has a follow me link as well as tweet link. It is compatible with all browsers.
I am sure you will love to see that bird flying.
Read Also:Twitter Recent Posts Widget, The Rare Widget Ever

How To Add the Twitter Flying Bird To Blogger?

  1. Go To Blogger > Design > Edit HTML
  2. Backup your template
  3. Search for </body>
  4. And just above it paste the code below

<script src='http://bloggerblogwidgets.googlecode.com/files/way2blogging.org-tripleflap.js' type='text/javascript'> 
</script> 
<script type='text/javascript'> 
var twitterAccount = &quot;AWAISAFZAL0313&quot;; 
var tweetThisText = &quot; <data:blog.pageTitle/> : <data:blog.url/> &quot;; 
tripleflapInit(); 
</script>

   5.  Replace AWAISAFZAL0313 with your twitter account username.
    6.  Save your template and you are done!
    7.   View your blog to see it flying. :)
If you faced any problem just let me know. Have fun!

How to Create a Table Of Contents Page For Blogger?

By on 13:22
Table-of-contents-for-blogggerYou have seen that I have created an automatically updated table of contents page that shows the links to all posts published so far at this blog. This widget displays all your posts category wise and really saves time. I was previously adding new links manually to the Blogger Tricks page but as soon as I came to know of this great widget from BT4U I instantly converted to it. This widget will also tell visitors that which posts are new and which are old. I have modified the CSS in order to make it suit your blog appearance.

Follow the steps below to create a TOC page for your blog

  1. Go To Blogger > Design > Edit HTML
  2. Back up your template
  3. Search for ]]></b:skin>
  4. And just above it paste the CSS code below,
/*--------BT4U TOC-----*/
.judul-label{
background-color:#E5ECF9;
font-weight:bold;
line-height:1.4em;
margin-bottom:5px;
overflow:hidden;
white-space:nowrap;
vertical-align: baseline;
margin: 0 2px;
outline: none;
cursor: pointer;
text-decoration: none;
font: 14px/100% Arial, Helvetica, sans-serif;
padding: .5em 2em .55em;
text-shadow: 0 1px 1px rgba(0,0,0,.3);
-webkit-border-radius: .5em;
-moz-border-radius: .5em;
border-radius: .5em;
-webkit-box-shadow: 0 1px 2px rgba(0,0,0,.2);
-moz-box-shadow: 1px 1px 4px #AAAAAA;
box-shadow: 0 1px 2px rgba(0,0,0,.2);
color: #e9e9e9;
border: 2px solid white !important;
background: #6e6e6e;
background: -webkit-gradient(linear, left top, left bottom, from(#888), to(#575757));
background: -moz-linear-gradient(top,  #888,  #575757);
filter:  progid:DXImageTransform.Microsoft.gradient(startColorstr='#888888', endColorstr='#575757');
}
.data-list{
line-height:1.5em;
margin-left:5px;
margin-right:5px;
padding-left:15px;
padding-right:5px;
white-space:nowrap;
text-align:left;
font-family:"Arial",sans-serif;
font-size:12px;
}
.list-ganjil{
background-color:#F6F6F6;
}
.headactive{
    color: #fef4e9;
    border: 2px solid white !important;
    background: #1C8DFF;
    background: -webkit-gradient(linear, left top, left bottom, from(#9dc2e7), to(#438cd2));
    background: -moz-linear-gradient(top,  #9dc2e7,  #438cd2);
    filter:  progid:DXImageTransform.Microsoft.gradient(startColorstr='#9dc2e7', endColorstr='#438cd2');
}                                                                                                                                                                                                                                                                                                       
     5.   Save your template and now create a New Page (not a new Post).
     6.    Give Your new Page a relevant title like “XYZ Table Of Contents” and then in the EDIT HTML mode of your blogger editor paste the code below,
UPDATED CODE:

<script src="http://abu-farhan.com/script/acctoc/daftarisiv2-pack.js"></script>
<script src="http://www.bloggertrick4you.blogspot.com/feeds/posts/summary?max-results=1000&amp;alt=json-in-script&amp;callback=loadtoc"></script>
<script type="text/javascript">
var accToc=true;
</script>
<script src="http://abu-farhan.com/script/acctoc/accordion-pack.js" type="text/javascript"></script>                                                                                                                                                    

See a screenshot on how things will appear,
Table-of-contents
Now simply replace http://www.bloggertrick4you.blogspot.com with your Blog URL and hit save. View your new page to see a beautiful Table Of Contents with a nice drop down effect.

Customize The TOC widget

By default I have kept the Category background in active colour mode to appear as blue and inactive as dark gray as shown below,
Customize-TOC

If you want to change the colour of the Active mode then simple change #9dc2e7 and #438cd2 . Here #9dc2e7   refers to a lighter shade and #438cd2 refers to a darker shade colour. So whatever colour you wish to use simply replace #438cd2 with your prefered colour and #9dc2e7  with the lighter shade of your prefered colour.

How to add Google Custom Search Box to your Blog/Website

By on 13:12

Google has a fantastic service of adding their custom search box to any blog/website.Search box helps your visitors in finding the content of their interest without moving away from your blog.
Google Custom Search engine is easy a search box on your website which show you search results on web history on Google but there is a benefit when you put upon your website page because people when search this box ads are appear in these results and you can easily make money form Google Custom Search engine.


How to add Google Custom Search Box to your Blog

If you have a account of Google Adsense then you can easily do this for making money from your website. 


Also check:How to Get Your Web Site to the First Results Page


Steps to add Google Custom Search Engine:


1.Go to Google Custom Search Engine or www.google.com/cse
2.Log in into your account.
3.Click on New Search Engine and enter your blog details.
4.Now hit on create button.


How to add Google Custom Search Box to your Blog

5.You have successfully created your custom search engine for your blog.
6.Now Click on Edit Search Engine to comletely Customize your Search engine.

How to add Google Custom Search Box to your Blog

7.Now click on "Setup" and enter your search engine name and Keywords realted to your blog.

How to add Google Custom Search Box to your Blog


8.Click on "Make money" and fill up your Adsense Detalis.
9.Go to "Look and Feel" and select the colours and layouts of your search engine.

How to add Google Custom Search Box to your Blog


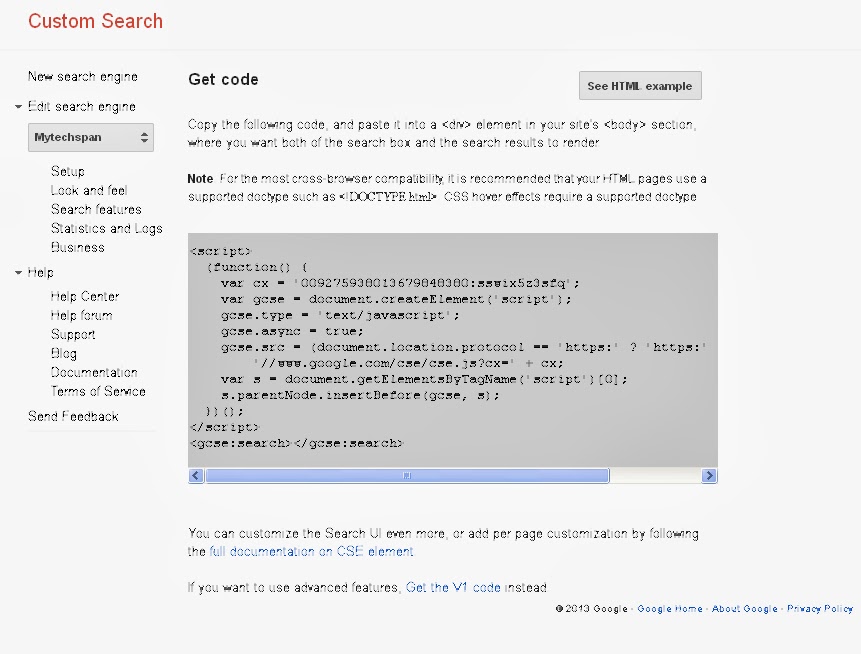
10.Now go to setup and click on getcode and copy it. 


How to add Google Custom Search Box to your Blog

11.Open your Blogger Dashboard and navigate to Layout->Add Gadget.

How to add Google Custom Search Box to your Blog

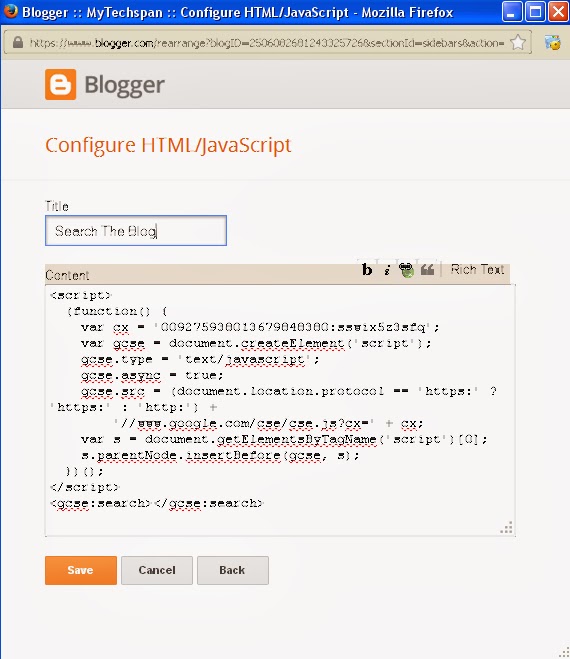
12.Select "HTML/Java script" and paste the code and save it.

How to add Google Custom Search Box to your Blog


13.Drag it to your desired position.
14.You are done.

Saturday, 21 December 2013

Feedburner Recent Comments Widget For Blogger

By on 07:54
Just few months back I wrote a post on how to add a Recent Posts Widget by Feedburner to your Blogger and Typad blogs and today we will learn a similar tutorial based on a really attractive and fast loading Recent Comments widget offered by Feedburner. This widget is really fast loading in a sense that it is well scripted and the JavaScript it uses is stored on feedburner’s server so there will be no load time delay on your blog.So lets learn how to add it to blogger.

To add the Recent comments Widget By Feedburner to your blogs follow these steps:

Burn Your Comment Feed At Feedburner

1.  Login To Your Feedburner Account. Incase if you don’t have one simply sign up for a free account.
2.  Insert your Comment Feed URL inside the Feedburner box. The URL for Blogger Blogs will be like this,
http://YOUR-BLOG-NAME.blogspot.com/feeds/comments/default
Replace YOUR-BLOG-NAME with your blog’s good name.Burn-your-feed-box
3.  Press the Next Button and you will be brought to a new page. Simply insert an easy memorable Feed title and feed address. I prefer both to be the same.
Feed-title-and-address

4.  Press Next and then fill the two options on the new page as shown below,
choose-feed-options

5.  Finally press the Next button again and you have successfully burnt your comment feed!
  • Now click the publicize button just at the top
publicize-button
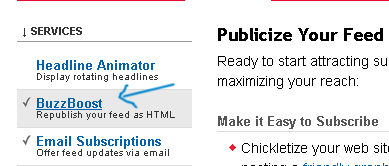
  • On the left sidebar click BuzzBoost
buzzboost
  • Hit The Activate button on the right pane
activate
  • Then fill in the options as shown below,
recent-comments-widget-sett
Its advisable to leave all boxes unchecked.
  • Finally click the save button and get your HTML code which will be just at the top of the page as shown below,
Widget-code
  • Done!
Read Also:Twitter Recent Posts Widget, The Rare Widget Ever!
Adopt a similar procedure for Typad

How to Add the Recent Comments Widget To Blogger

Now once you have copied the code for your recent comments widget then simply follow the steps below,
  1. Log into Blogger
  2. Go To Layout
  3. Click Add a Gadget or Add a Page element
  4. Choose HTML/JavaScript Widget
  5. Now paste the Feedburner code inside this widget and hit save
  6. Done!
Finally Preview your template to see it hanging on your sidebar

Feedburner Recent Posts Widget For Blogger

By on 07:35
You might have glimpsed latest mail widget suspending on the sidebar of some blogs but most often this widgets have a JavaScript cipher in it that badly rises the load time of your sheet. Today we will learn how to add a latest posts widget suggested by Feed-burner to your blogs which is neat, appealing, exclusive and most importantly fast stacking.
Let me notify you that Feed-burner also utilizes JavaScript but it’s really smart when it arrives to sheet burden time, because the JavaScript is not exactly connected to your blog, 50% of the burden time is shared by Feed-burner.
Feed-burner as you all know is the best web service for submitting your blog feed. Once you sign up with them they will provide you with several widgets like a Rotating Headlines Banner, Subscription Email form as you can see on my sidebar, a feed counter and most importantly a Recent Post widget like the one on my sidebar,
feedburner-recent-post-widg
These are steps you may follow,
1. Sign up for a Feedburner Account , which I hope you already have.
2. Log in your account and click on the Publicize button as shown below,
publicize
Read Also:Create Facebook and Twitter Custom Follower Counters
3. Then Click on BuzzBoost on the sidebar at your left.
buzzboost
4. On the page that opens , you will see a small form,
feed-form
Fill the form with relevant information. Leave all Boxes unchecked. Keep the number of items(Links) as low as possible. You can choose 8 links to be displayed but 6 would be better. Choose Links to be opened in Same Window
Read Also:How to Add Facebook Slide Likebox
5. Now copy the code they provide you as shown below,
Copy-this-Code
6. Log in your blogger Account and then go to Layout > Page Elements
Layout
7. Select add a gadget and the choose HTML/JavaScript
add-a-gadget
html-javascript
8. Now Paste the code into the widget and give it a title “ Recent Posts”
9. Done!
To add a Twitter Recent Posts Widget to your blogs Click this -> Twitter Recent Post Widget